Capybara DXF
I downloaded Inkscape and then searched on Google for some capybara png's. Then, I downloaded a png I wanted and imported it into inkscape. In Inkscape, I went to Path > Trace Bitmap in order to get a black and white vector version of the png I wanted. Then, I imported
it as an DXF onto a flashdrive, and OFF THE SHOPBOT WE GOOOOOO!

I then used the CNC machine with the guidance of Kassia. I only wanted a small capybara, so we are going for approximately 3 inches. The depth of the wooden board was 0.75 inches. Because the capybara was small and the CNC cannot cut precise details, I had no choice but to delete cute little marks on my capybara that represent the fur. Additionally, some of the lines in the capybara vector was not connected, so in order to select what I actually want as my pocket and border, I had to connect some lines to get the area I want.
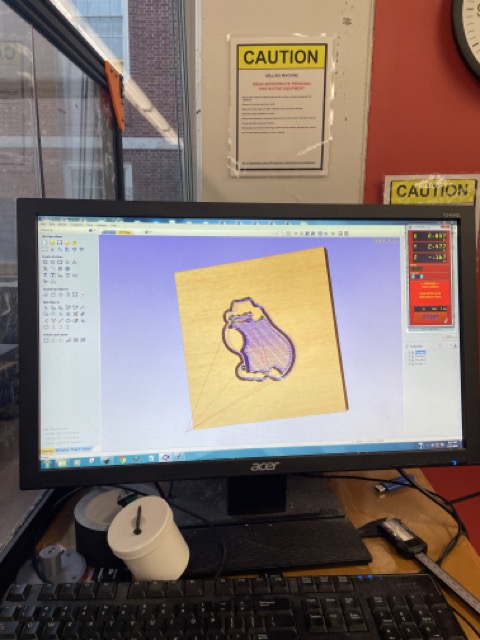
Some other challenges were that I could not figure out a way to exclude places from the area that I designate as my pocket. My capybara has these blushes indicated by big circles. However, these circles are in the bigger pocket in the middle of the capybara. I cannot find a way to have the pocket be everything except for those blushes. Kassia tried to help me but we couldn't figure out a way. RIP.
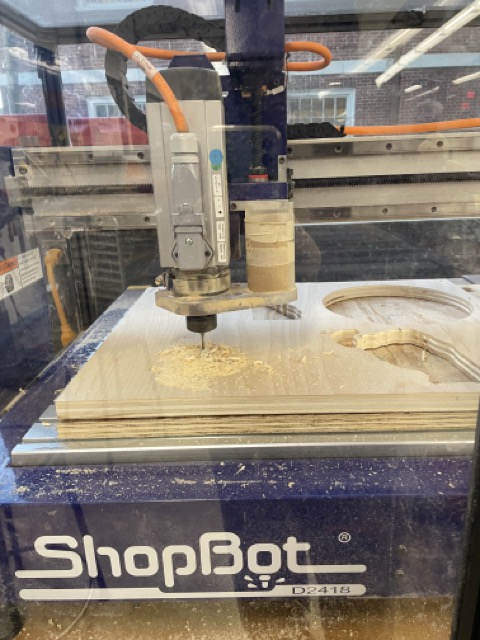
We then set the cnc machine into action!! The cutting did not go unhitched. I had to stop the machine halfway in order to vacuum the shavings. The shavings were getting in the way of the cutting path, so the cnc machine ended up botching the border of my capybara.
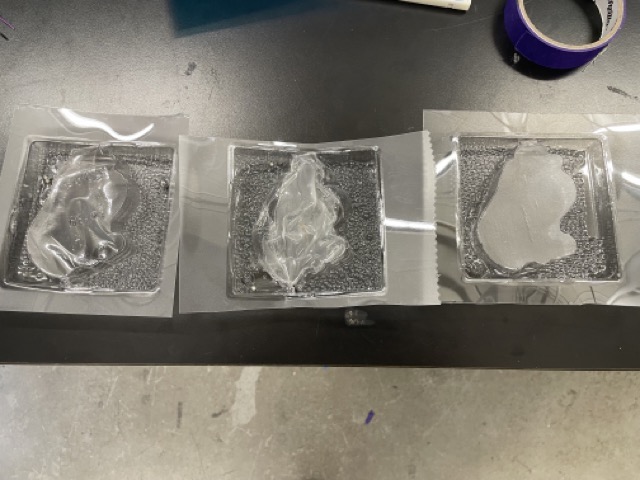
After the ShopBot finished cutting out my capybara, I sanded my capybara a little bit, and then went to vacuum form a plastic sheet. Because my capybara was pretty small, I used the dental vacuum form machine. It was small, but I think I will be able to catch when the plastic is melted enough to drape it over the capybara when it's time. The bigger machine would require more of a hassle to see if the plastic is melting enough.
What is considered melting "enough"? I was told, when the plastic starts to drape and sag a little bit, but that is still not specific enough, so I did a little bit of trial and error. I used the vacuum form machine three times. Both the first and second time, I waited too long. The plastic was too hot and was really grabbing onto the wooden piece making it really hard to pull out the capybara. When I did manage to pull out the capybara, I ended up with a botched plastic mold. I would say the right time would be when it starts to drape, and give it another 45 seconds to a minute. If it starts to rapidly drape lower and lower very quickly, that means the appropriate time has passed. Attached is the sequential order of my attempts at the vacuum form machine.
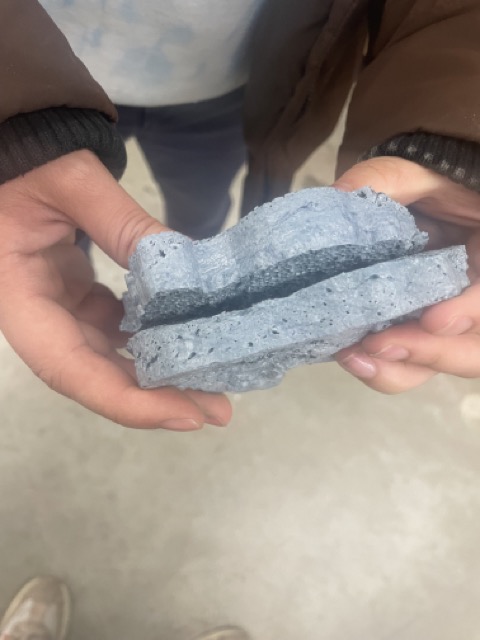
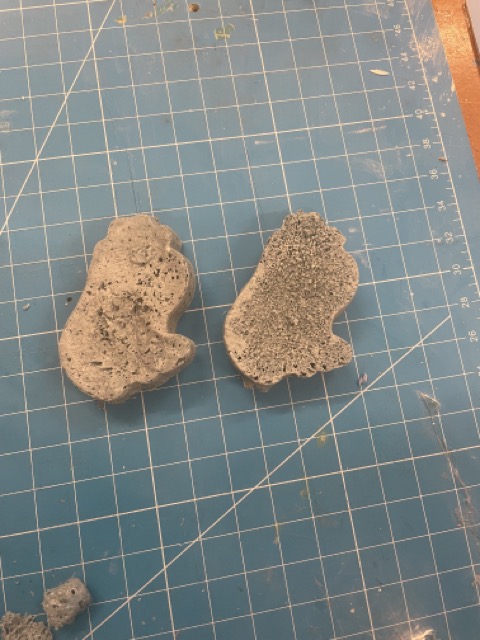
I then grabbed liquid plastic part A and part B and followed the instructions there to make a 1:1 ratio mix. I wanted to give my capybara a little bit of marbling, so I added in purple, white, and green paint. I mixed it up too much, so it ended up not marbling. Interestingly though, I think the paint might have reacted to the liquid plastic mixture, because as soon as I put in the paint to mix, the mixture started to bubble up and expand. It was an exothermic reaction based on how the heat was just radiating out of the bucket.
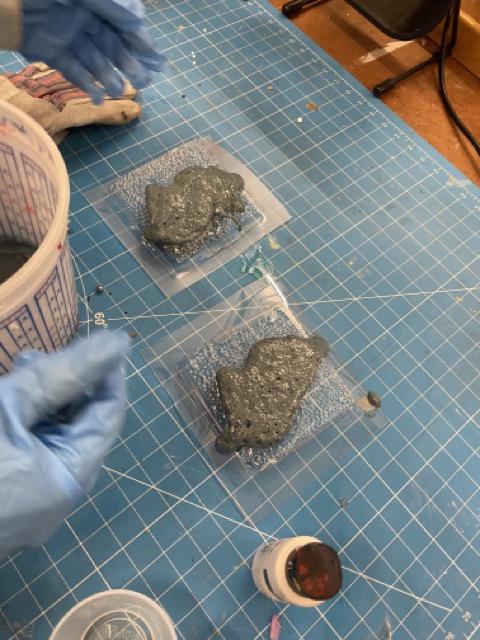
This happened really fast, and I was scared that the liquid plastic will cure before I even get it into my mold. I dumped it into my various capybara mold and let the molds to cure. One of them, I left to cure for 4 minutes, and the other one, I left to cure for 10 minutes as the recipe suggested. The mold that was left to cure for 10 minutes was definitely harder to remove, but it left a shape that was alot more voluptuous.
Cutting with the ShopBot
I then used the CNC machine with the guidance of Kassia. I only wanted a small capybara, so we are going for approximately 3 inches. The depth of the wooden board was 0.75 inches. Because the capybara was small and the CNC cannot cut precise details, I had no choice but to delete cute little marks on my capybara that represent the fur. Additionally, some of the lines in the capybara vector was not connected, so in order to select what I actually want as my pocket and border, I had to connect some lines to get the area I want.
Some other challenges were that I could not figure out a way to exclude places from the area that I designate as my pocket. My capybara has these blushes indicated by big circles. However, these circles are in the bigger pocket in the middle of the capybara. I cannot find a way to have the pocket be everything except for those blushes. Kassia tried to help me but we couldn't figure out a way. RIP.
We then set the cnc machine into action!! The cutting did not go unhitched. I had to stop the machine halfway in order to vacuum the shavings. The shavings were getting in the way of the cutting path, so the cnc machine ended up botching the border of my capybara.
Vacuum Form:
After the ShopBot finished cutting out my capybara, I sanded my capybara a little bit, and then went to vacuum form a plastic sheet. Because my capybara was pretty small, I used the dental vacuum form machine. It was small, but I think I will be able to catch when the plastic is melted enough to drape it over the capybara when it's time. The bigger machine would require more of a hassle to see if the plastic is melting enough.
What is considered melting "enough"? I was told, when the plastic starts to drape and sag a little bit, but that is still not specific enough, so I did a little bit of trial and error. I used the vacuum form machine three times. Both the first and second time, I waited too long. The plastic was too hot and was really grabbing onto the wooden piece making it really hard to pull out the capybara. When I did manage to pull out the capybara, I ended up with a botched plastic mold. I would say the right time would be when it starts to drape, and give it another 45 seconds to a minute. If it starts to rapidly drape lower and lower very quickly, that means the appropriate time has passed. Attached is the sequential order of my attempts at the vacuum form machine.
Liquid Plastic into the Mold:
I then grabbed liquid plastic part A and part B and followed the instructions there to make a 1:1 ratio mix. I wanted to give my capybara a little bit of marbling, so I added in purple, white, and green paint. I mixed it up too much, so it ended up not marbling. Interestingly though, I think the paint might have reacted to the liquid plastic mixture, because as soon as I put in the paint to mix, the mixture started to bubble up and expand. It was an exothermic reaction based on how the heat was just radiating out of the bucket.
This happened really fast, and I was scared that the liquid plastic will cure before I even get it into my mold. I dumped it into my various capybara mold and let the molds to cure. One of them, I left to cure for 4 minutes, and the other one, I left to cure for 10 minutes as the recipe suggested. The mold that was left to cure for 10 minutes was definitely harder to remove, but it left a shape that was alot more voluptuous.